Awesome Info About How To Build A Walkie Talkie

How To Make A Walkie Talkie: 12 Steps (with Pictures) - Wikihow

Make A 1.5 K.m Range Walkie Talkie # Without Noise Clear Sound# - Youtube
Diy Walkie-talkie With Generic 433mhz Rf Modules : 4 Steps - Instructables

Kit Build Update #2: Diy Walkie Talkie - Youtube

Homemade Walkie Talkie With Nrf24l01 || Real-time Project Diy Household Materials - Youtube

How To Make Wireless Phone Set Easy At Home - With Circuit Diagram Walkie Talkie Youtube
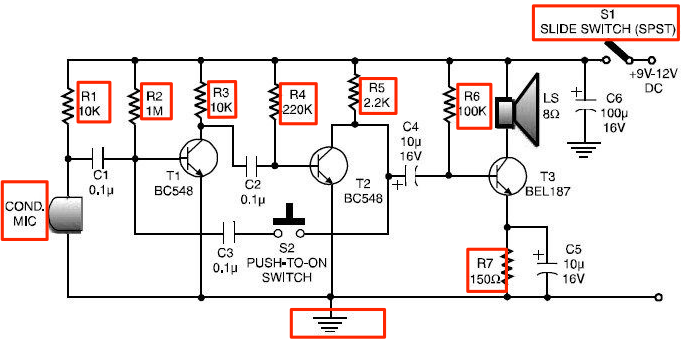
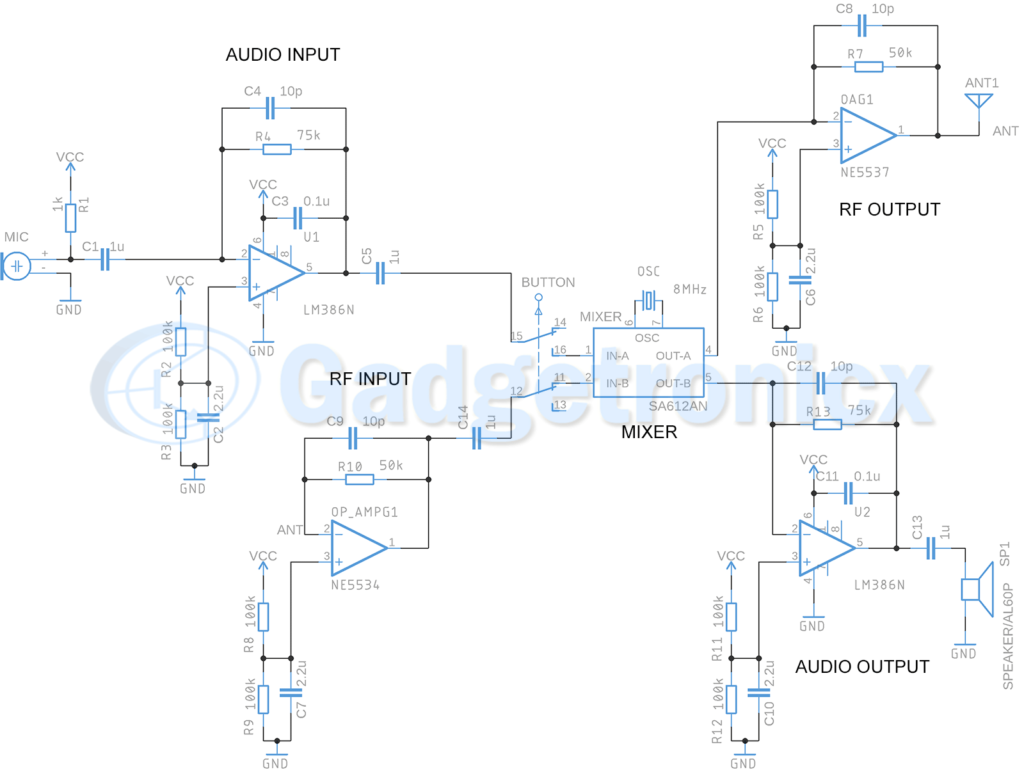
How do you use the walkie talkie circuit?
How to build a walkie talkie. The string placed on the end of the cup can pick up the vibrations from the bottom of the cup, and transfer your. Vc1 is again 25 pf, and cl is omitted. How to make walkie talkie using arduino step 1:
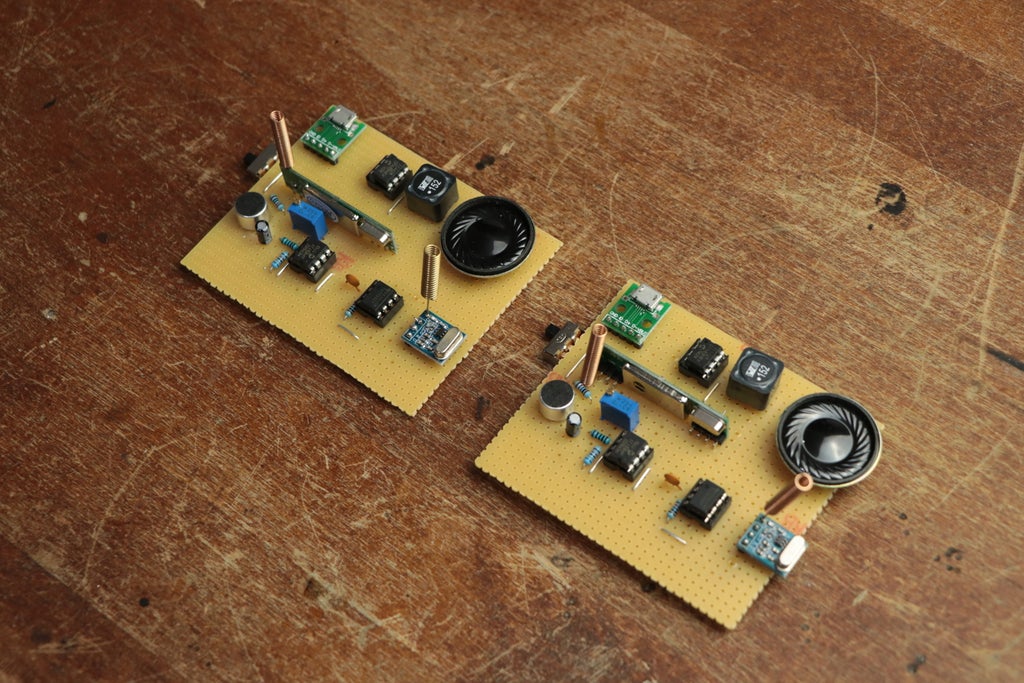
Connect mic with resistor and capacitor. Using a microphone module connected to the a0 pin of the arduino, i am going to capture my voice. The first thing to do is to solder a 10k resistor and 10uf capacitor to the microphone.
Apply pressure to break it open at the center, in the same way you might. 2) we would like to design a pcb and aim. Jlcpcb prototype for $2(any color):
Build your own intercom or walkie talkie out of two old cordless phones step 1: Jlcpcb smd assembly coming soon: Touch and hold the talk button, then say something.
The 28 mhz band will require. Tap on the “+” icon: All you need to do is to connect either end of the string to the end of both cups.
And, using a 8ohm 0.5w speaker, connected to the d9 and d10 pin of the arduino i am. Arduino uno and arduino nano are not selected in this project because 1) the rf module and bluetooth module we are using are all 3.3v powered; Now you can too!, writes daniel chote on his blog.

How To Make A Walkie Talkie: 12 Steps (with Pictures) - Wikihow

Diy Walkie-talkie With Generic 433mhz Rf Modules : 4 Steps - Instructables

Diy Walkie Talkie - Endless Fun For Your Kids! | Firstmomsclub
Diy Walkie Talkie: A Complete Step-by-step Guide

Make Your Own Very Crude Walkie-talkie With An Arduino - Youtube


How To Make Walkie Talkie Making Using Cardboard Box |walkie At Home |diy Crafts Ideas | Used Boxes, Crafts,
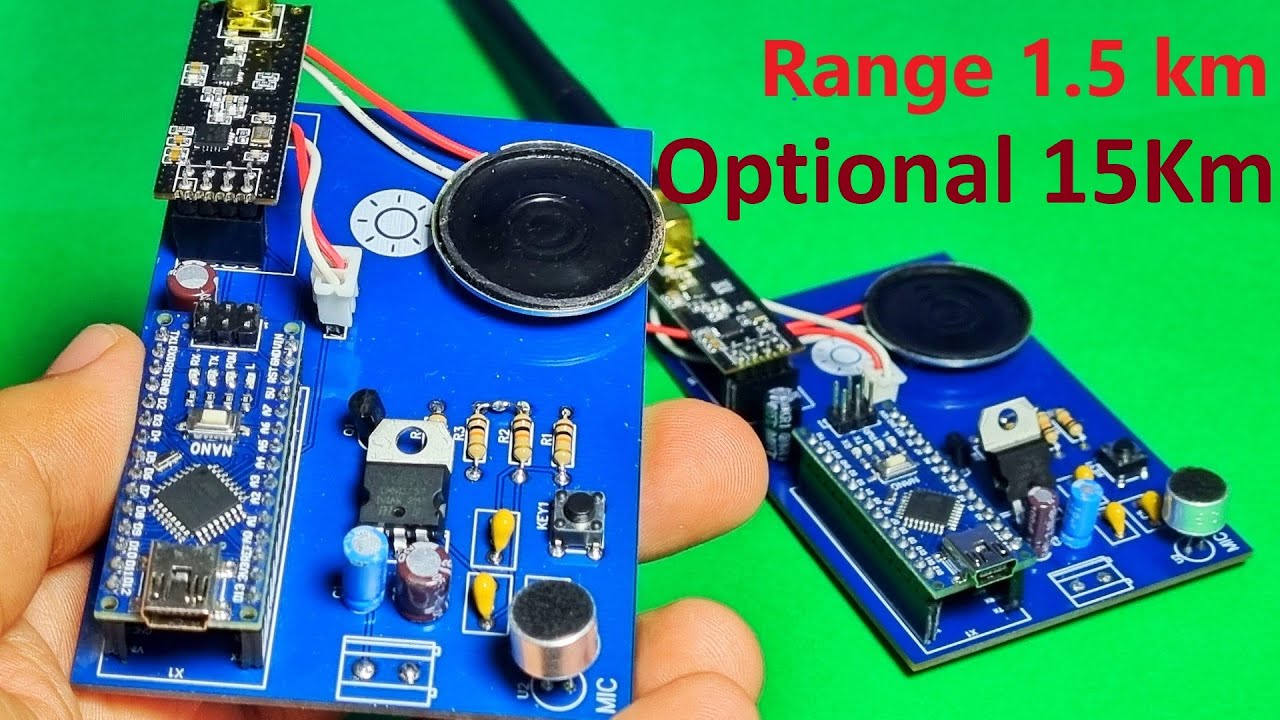
How To Make Wireless Walkie Talkie Using Arduino At Home / 1.5 K.m Range Optional 15 Km - Youtube

How To Make A Walkie Talkie: 12 Steps (with Pictures) - Wikihow

How To Make Walkie Talkie At Home | Wireless Fm Transmitter |fm - Youtube
Diy Walkie Talkie
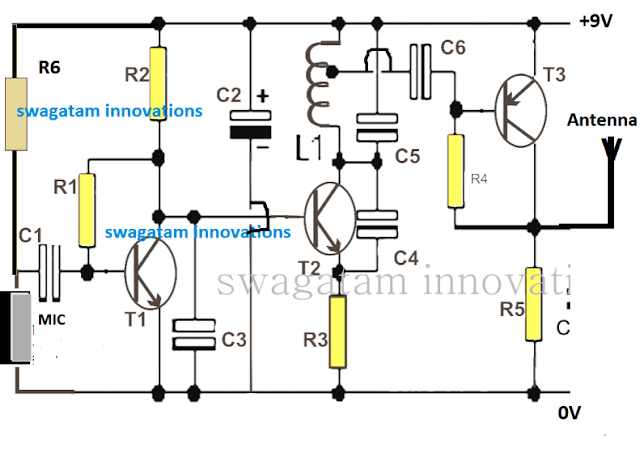
Make A Walkie Talkie Circuit Using Fm Radio | Homemade Projects

Make A 500m Range #walkie-talkie In Easiest Way (part 1) - Youtube